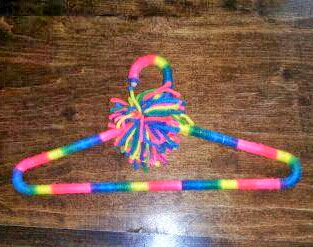
When I pinned a scarf and sunglasses hanger similar to this a long while ago, it reminded me of a yarn-tying craft I used to do at summer day camps when I was young. Anyone remember doing these?
Well,
not only did I think that hanging belts would be another great closet
item to organize, I thought tying yarn around it would help to keep the
hooks from sliding.
I will show you step-by-step how to complete this project.
Supplies/Cost
Crochet Yarn (or any yarn on the heavier end), $3-$6
Wooden Hangers, $4 for 8pk
Scissors, $0
Shower Hooks, $1 at the dollar store
Project Length
1 1/2 hours?
The best thing about this particular project is that you can do it completely at your own pace.
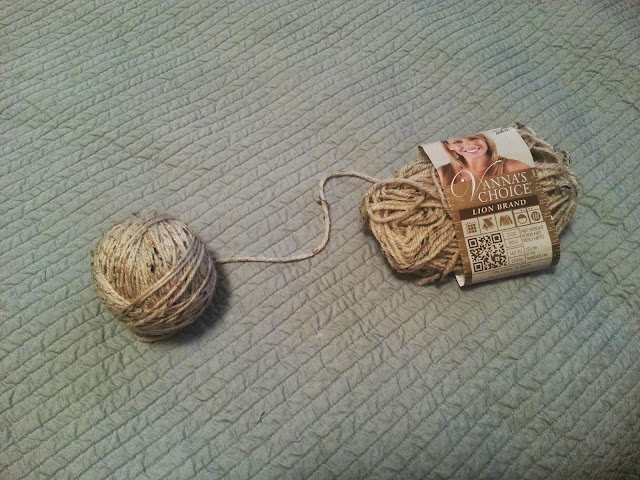 First, ball about half of your yarn...a little time consuming but will make this-and future projects-so much easier.
You'll
begin by holding the hanger updide down between your legs...unless you
can come up with a more genius was of stabilizing the hanger, that is.
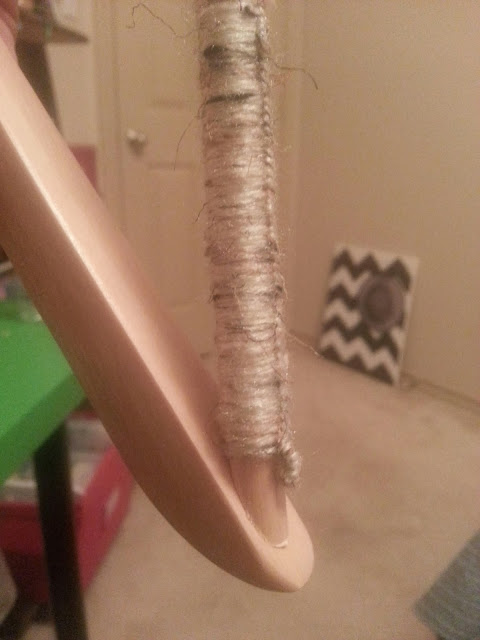
 You'll
tie a knot as tight as possible (see figure 1). Don't worry about the
small piece of yarn leftover from the knot because you'll be able to
just knot over that as you go.
You'll
tie a knot as tight as possible (see figure 1). Don't worry about the
small piece of yarn leftover from the knot because you'll be able to
just knot over that as you go.The next step can be mirrored, according to your comfort. Hold the ball of yarn in one hand while holding a little slack in the other. The yarn should cross over the hanger rod (see figure 2).
Next, bring the ball of yarn around (under) the hanger rod and through the opening made by the rod and yarn slack (see figures 3 & 4).
 Then,
pull taut, making sure that excess yarn from the original knot is
laying down and will be covered by this-and subsequent-knots. What we're essentially doing is repeatedly knotting.
Then,
pull taut, making sure that excess yarn from the original knot is
laying down and will be covered by this-and subsequent-knots. What we're essentially doing is repeatedly knotting. 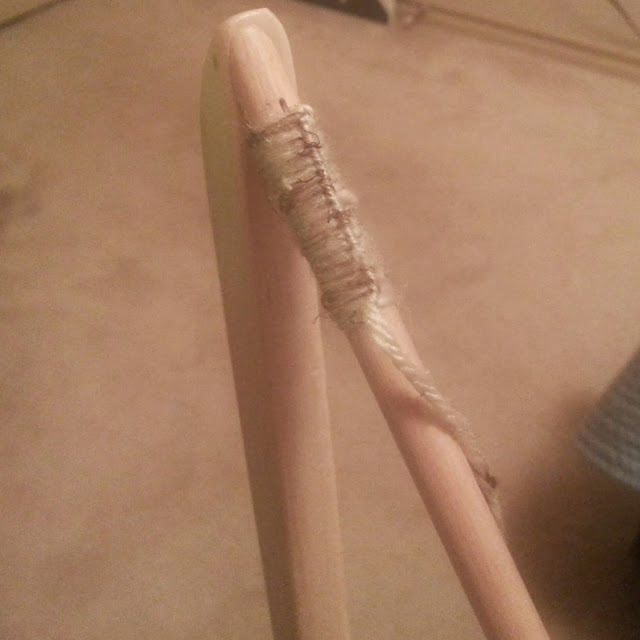 It
is possible that you'll notice your knots going diagonally after every
three or four ties...just twist back toward the middle and it'll be
fine.
It
is possible that you'll notice your knots going diagonally after every
three or four ties...just twist back toward the middle and it'll be
fine.
Continue
knotting until you've reached the other end of the rod. Give yourself
about six inches and cut the yarn so you may tie a few knots to hold
your work. Cut away excess yarn.
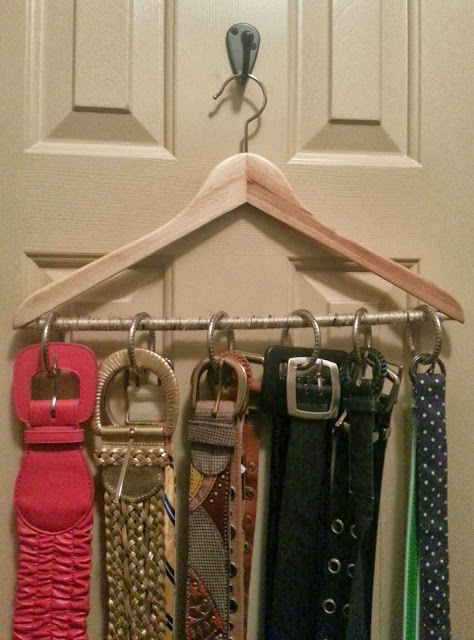
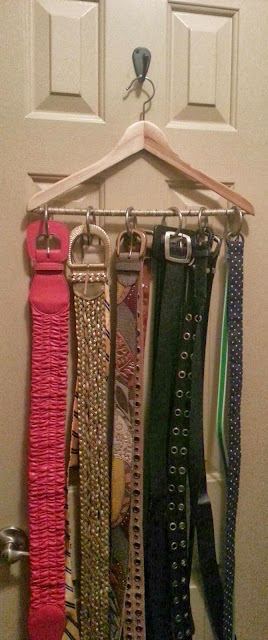
Finally, group your belts-or scarves or hats-how you see fit and use as many shower hooks necessary to hang your items! Command hooks work very well to hang your finished project.
 I
got a little creative with the last hanger I did and tied around the
rest of the hanger as well. Also, as you can see in this pic, it might
be necessary to do two hangers if you have so many items your project is cluttered.
I
got a little creative with the last hanger I did and tied around the
rest of the hanger as well. Also, as you can see in this pic, it might
be necessary to do two hangers if you have so many items your project is cluttered.
I'd love to know how yours turns out!

No comments:
Post a Comment